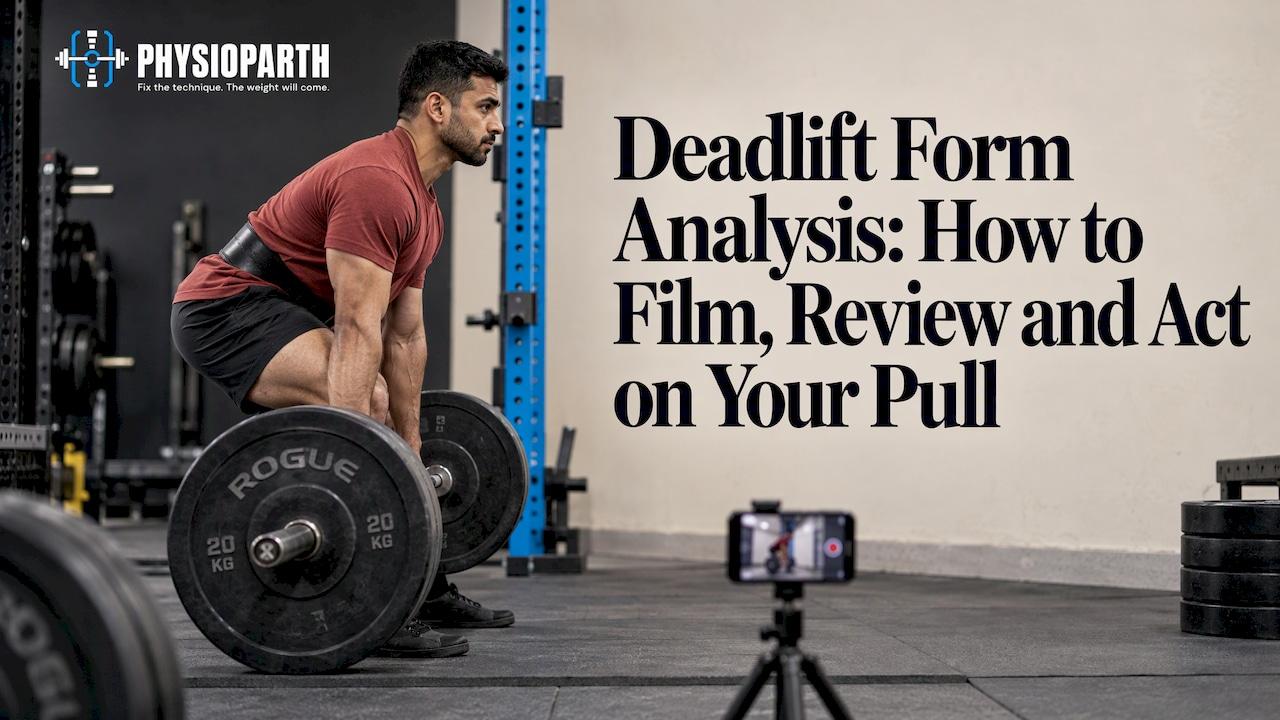
A useful deadlift form analysis starts with one clean side-on clip, reviewed in a fixed order: start position, bar path, range, then tempo. You pick one fault to change, and you re-film the same angle to see if it moved. If the lift is painful, video cannot tell you why, and the next step is a proper assessment, not another clip.
I'm Parth Suthar, a registered physiotherapist in Ontario (PT Reg. Ont.) and a former competitive powerlifter. Below is how I would film and read a pull, which video myths to avoid, and how to separate technique causes from load-management causes.
TL;DR
- Film from the side, square to the bar, at about hip height and 2.5 to 3 m away, with your whole body and both plates in frame.
- Review in order: start position, bar path, range, tempo. Change one thing per set.
- Video shows visible movement. It cannot diagnose pain or predict injury, and 2D video can mislead on back shape and knee position.
- Pain in the lift is different from soreness. Modify the pull by criteria (tempo, paused, pin, trap bar, block pulls, isometrics) and get assessed.
- Red flags such as leg weakness, saddle numbness or bladder changes need urgent in-person care.
Table of Contents
- How to film a deadlift so the clip is worth reviewing
- What to check, in order
- What video cannot tell you
- Apps for reviewing your clips
- Technique causes versus load-management causes
- If it hurts: structures that may be involved and how they differ
- A criteria-based return to pulling
- Red flags: when you need in-person or medical assessment
- Where my perspective fits
- Working with me
- Frequently asked questions
- Book with me
- Sources
How to film a deadlift so the clip is worth reviewing
Most bad form checks are bad camera setups. The guidance I trust here is consistent across sources: a fixed side view, close to perpendicular to the bar, at roughly hip height. Fitsly's remote form check guide puts the phone 2.5 to 3 m away, with head to feet, both plates and the floor visible. PoinT GO suggests mid-barbell height at a similar distance, and a higher frame rate if you want to see sticking-point mechanics.
My practical checklist:
- Angle: true side-on. If the near plate hides your back, move the phone slightly behind you rather than shooting from the front.
- Height: about hip height on a stable support, not held by a friend who drifts.
- Distance: far enough that your feet, the full bar and the lockout all fit. Standing too close with a wide lens can bend a straight bar path into a curve, which The Workout Mag flags as a common trap. Use optical zoom rather than digital zoom if you need to frame tighter.
- Clothing: fitted or contrasting, so the hip, knee and shoulder are visible frame by frame.
- Load: film one to three controlled reps at the same load each time, so clips compare fairly.
- Consistency: same angle, same bar, same footwear. Otherwise you are comparing cameras, not lifts.
To check a squat the same way, the angle changes: a 45° front corner at hip height, showing the feet, both bar ends and full depth, per the same Fitsly guide. Keep the review order identical.
What to check, in order
Review each clip in the same sequence every time. A study in the Journal of Strength and Conditioning Research developed assessment protocols covering 10 aspects of deadlift technique and 17 for the squat, which shows that breaking technique into defined parts is a reasonable way to look at it. You do not need ten items for your own clips. Four passes are enough.
1. Start position
Pause the first frame before the bar moves.
- Bar over midfoot, shins close to the bar.
- Hips lower than shoulders, not a squat and not a stiff-leg pull.
- Upper back set, arms long, lats engaged.
- Trunk braced before the pull, not during it.
This matches the set-up sequence described by Titans Grip: bar over midfoot, grip without rolling the bar, shins to the bar, upper back set, brace, then push the floor away.
2. Bar path
The bar should travel close to your legs. Look for the bar drifting away from the shins, which increases the demand on the lower back, and for a jerky start where the bar is yanked off the floor. ScoreRep lists those two faults alongside hips shooting up before the bar moves.
3. Range
From the floor to lockout, watch for hips rising faster than the shoulders, leaning back at the top, and an uneven finish with one side of the bar rising first. A rear-quarter view can distort depth and horizontal bar travel, so stay side-on when judging range.
4. Tempo
Is the first inch smooth? Does the bar slow just below the knee? Is the lowering controlled or dropped? A pause at the start, below the knee and at lockout in slow playback, as Titans Grip suggests, makes the sticking point easier to see.
Then choose one cue, ideally the set-up fault furthest upstream, and describe an action rather than a position. "Pull the slack out of the bar" works better than "don't round." Test it on the next set and compare.
What video cannot tell you
A phone clip shows visible movement. It does not show pain, tissue state or injury risk, and it cannot guarantee a referee's verdict. TrainPowerlifting is direct about this limit, and I agree with it.
There are also specific visual traps in 2D video, listed by The Workout Mag:
- Hip height at the start depends partly on your femur-to-torso proportions, so a higher or lower hip is not automatically a fault.
- Large spinal erectors can make the lower back look more rounded than it is.
- A pure side view cannot show knees caving in, which is a frontal-plane position.
- A strong anterior pelvic tilt at lockout can make the hips look pushed back even when you have reached full extension.
The same caution applies to automated tools. A 2026 arXiv preprint on markerless pose estimation found that results depended strongly on camera orientation and occlusion, and that non-sagittal views distorted 2D joint angles. Treat any app overlay as a prompt to look closer, not as a measurement.
Apps for reviewing your clips
You do not need an app for a first pass, since your phone's slow-motion playback works. If you want drawing tools and side-by-side comparison:
| Tool | What it does | Price noted |
|---|---|---|
| OnForm | Slow motion, markup, side-by-side or overlaid video, voice-overs | Individual plans $9.99 or $14.99 a month in the Canadian App Store |
| Kinovea | Frame-by-frame playback, angle and line tools, motion-path tracking | Free, Windows desktop software |
| CueForm | AI feedback on recorded squat, bench and deadlift sets | First check free, then $10 per check or $20 a month for 12 checks |
If you are searching for a replacement for Coach's Eye, TechSmith pulled that app from sale in September 2021 and retired the service in September 2022. A different company now publishes an app under a similar name. Prices change, so confirm them on the store page before you subscribe.
Technique causes versus load-management causes
When a pull feels bad, I separate two lists. Mixing them is why lifters keep "fixing" their form when the real issue is the week they just had.
Technique causes (what you can see on video):
- Set-up: bar too far forward of midfoot, hips too high or too low, slack not pulled.
- Bar path: bar drifting away from the legs.
- Bracing: trunk not set before the pull, ribcage flaring at lockout.
- Grip: grip failing or uneven, shoulders not stabilised.
- Stance: too narrow or wide for your build, toes turned out excessively.
- Depth and range: hips shooting up first, a lockout reached by leaning back.
Load-management causes (what the training log shows):
- Volume: a jump in weekly sets or reps.
- Intensity: several heavy singles close together or a sudden new max attempt.
- Frequency: pulling heavy more often than recovery allows.
- Recovery: poor sleep, a stressful work period, or a new block after time away.
If your clips look the same as last month but your pain started after a volume jump, the more likely lever is the plan, not the cue. If the load was steady but your bar path changed, the technique list is the better place to start. Neither list diagnoses anything. They tell you where to look first.
If it hurts: structures that may be involved and how they differ
I can't diagnose you from an article, and nobody can from a video. What I can do is describe patterns that may indicate which area is involved, so you can describe your symptoms clearly.
| Area | Typical pattern that may indicate it | Related page |
|---|---|---|
| Lumbar muscles and joints | Central or one-sided low back ache that changes with position or load, often worse bent forward under load | Deadlift back pain |
| Sacroiliac joint region | Pain low and to one side near the dimple of the back, often with single-leg loading or the first pull | SI joint pain |
| Piriformis and deep hip rotators | Deep buttock pain, may be worse with sitting or hip rotation | Piriformis pain |
| Lumbar nerve root or sciatic nerve | Leg pain, tingling or numbness that travels below the knee | Sciatica and deadlifts |
| Hip flexors or adductors | Front-of-hip or groin pain, worse on lifting the leg or at the start of the pull | Hip flexor strain and groin pain |
The general differences: muscle-type pain is usually local and reproduced by a specific movement or by pressing on it. Joint-type pain tends to be position-dependent. Nerve-type symptoms travel, and may include tingling, burning or numbness. Overlap is common, which is why a hands-on-by-video assessment with movement testing is more useful than guessing.
If your concern is a rounded back specifically, my page on the rounded back deadlift covers when it matters and how to progress.
A criteria-based return to pulling
Rest is rarely the whole plan. Where it is appropriate, I aim to modify the lift so you can keep loading the system while symptoms settle. You move to the next step when you meet the criteria, not when a date arrives.

Step 1: Reduce provocation, keep the pattern. Use isometrics (for example, a mid-shin pull against pins at a moderate effort) and slow tempo deadlifts with light loads. Move on when: the isometric holds do not raise your pain above a level you and your physio agree is acceptable, and symptoms settle within a reasonable time after the session.
Step 2: Shorten the range or change the lever. Try block pulls or pin pulls from a height where the position is comfortable, or a trap bar deadlift, which changes where the load sits relative to your body. A Safety Squat Bar can serve the same purpose on squat days. Move on when: you can complete your planned sets with consistent bar speed and no symptom build-up across sets.
Step 3: Add control. Use paused deadlifts (pause just off the floor or below the knee) and tempo reps to rebuild the sticking point. For pressing days, a floor press can limit shoulder range while you keep training. Move on when: the paused rep looks like the unpaused rep on video and next-day symptoms stay stable.
Step 4: Lower the block or pin height. Lower the start height in small increments toward the floor. Move on when: each height meets the same two criteria: stable symptoms and unchanged bar path.
Step 5: Return to the floor and rebuild load. Reintroduce conventional or sumo pulls at submaximal loads, then increase volume before intensity. Hold or step back when: pain rises and stays up, or your bar path starts changing again.
For squat-specific issues, see squat bracing, hip pain when squatting and the squat hip shift pages. My free Lifter's Hip and Lower Back Toolkit is a place to start with the basics.
Red flags: when you need in-person or medical assessment
Stop pulling and get assessed in person, or urgently, if you have:
- Numbness around the groin, genitals or inner thighs (saddle area), or new difficulty controlling your bladder or bowels. Go to an emergency department.
- Leg weakness that is new or getting worse, such as a foot that catches or a leg that gives way.
- Severe pain after a sudden injury, a pop or tear, with bruising, marked swelling, or an inability to bear weight.
- Constant pain at night that does not change with position, unexplained weight loss, or fever alongside back pain.
- Chest pain, shortness of breath or dizziness during or after lifting.
These need a physician or emergency care, not a form cue. Pain that is persistent but without these signs is a reason for a physiotherapy assessment, where the plan aims to keep you loading with modifications where appropriate.
Where my perspective fits
I lifted competitively before I became a physiotherapist, and I still think a good video is one of the best tools a lifter has. But a clip answers "what does the movement look like?" It does not answer "what is irritated, and how much load can it tolerate this week?"
That is why my assessment combines the history, a movement screen and, if you send videos beforehand, a lift analysis. The aim is to explain what tissue may be irritated in lifter terms, and to build a return plan with modified variations and clear criteria, so progress is decided by how you respond, not by the calendar.
If you are filming your pulls without pain, use the process above and enjoy it. If you are filming them because something hurts, that is where I aim to help.
Parth
Working with me
My Initial Assessment is $130 and includes a full subjective and objective assessment and a movement screen, plus a lift analysis if you send videos beforehand. Follow-Up Sessions are $100. Care is by video, you do not need a referral to see a physiotherapist in Ontario, and many extended-health plans cover physiotherapy, though some insurers require a referral for reimbursement, so check yours. I provide receipts. You can start with the Initial Assessment or follow-up booking, or see the audit page for how a lift review works.

The free 15-minute call is a fit check. It is not an assessment or treatment. It lets us see whether virtual physiotherapy suits your situation before you commit.
If you want a printed checklist for the pull, the set-up and bar-path items above translate directly into a pre-set routine you can run before every heavy single.
Frequently asked questions
How do I check my own deadlift form?
Film one to three controlled reps from the side at hip height, about 2.5 to 3 m away, with both plates and your whole body visible. Review the start position, bar path, range and tempo in that order, then choose one cue to test on the next set. Keep the angle and load the same when comparing clips.
Can a form check tell me why my back hurts?
No. Video shows visible movement, not tissue state, and large erector muscles or camera angle can make your back look different from reality. Pain during a lift is better explored through an assessment that looks at your history, movement and load, with red flags ruled out first.
Should I stop deadlifting if it hurts?
Not always, but you should change something. Many lifters can continue with modified variations such as tempo, paused or block pulls, a trap bar or isometrics, with the plan guided by symptom response. Stop and seek care promptly if you have any red flags listed above.
Is there a good replacement for Coach's Eye?
OnForm, Kinovea and CueForm cover slow motion, drawing tools and side-by-side comparison, each with different pricing and platforms. An app helps you see the lift, but it will not tell you why a movement hurts.
Book with me
If your deadlift or squat hurts, or you want a second set of trained eyes on your technique, book with me for a free 15-minute consult at physioparth.com.
Sources
- Content Validity Index and Reliability of a New Protocol for Squat and Deadlift Technique (JSCR, 2020)
- How to run remote form checks (Fitsly)
- Deadlift Form: Setup, Bar Path, and Lockout Guide (Titans Grip)
- How to Analyze Powerlifting Form From Video (TrainPowerlifting)
- Analyzing a Video of Deadlift Form: 5 Myths Busted (The Workout Mag)
- How to Track Bar Path with Video Analysis (PoinT GO)
- Deadlift Form Analyser and Bar Path Review (ScoreRep)
- Markerless Pose Estimation for Resistance Training (arXiv, 2026)
- OnForm: Video Analysis App (Canadian App Store)
- Kinovea features overview
- Best Bar Path Apps for Squat, Bench, Deadlift (CueForm)
- ReplayR vs Coach's Eye comparison
Recommended
- Rounded Back Deadlift: When It Matters and How to Progress
- Deadlift Back Pain: Ontario Lifters’ Tissue Clues and Return Criteria
- Piriformis Pain From Deadlifts: Clues and a Return Plan
- Sciatica and Deadlifts: How to Train Around Leg Pain
This article is general education for strength athletes and is not a substitute for an individual assessment. Pain that is severe, worsening, or accompanied by numbness, weakness or loss of function needs prompt in-person or medical assessment. Author: Parth Suthar, Registered Physiotherapist (Ontario).