
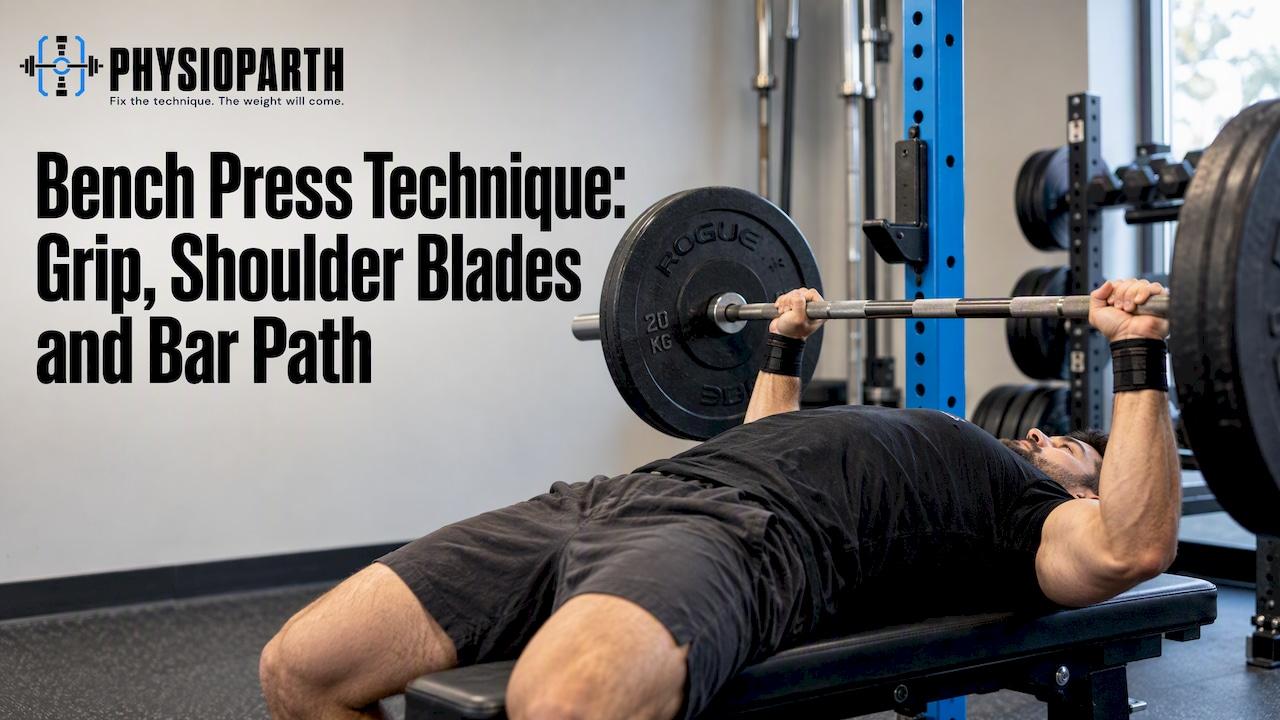
Good bench press technique comes down to five things: a stable base through your feet and upper back, shoulder blades set on the bench, a grip width you can control, a consistent bar path, and a training dose your tissues can tolerate. Get those right and the bar tends to move better. Get them wrong and the shoulder, elbow or wrist is often where you feel it first.
I'm Parth Suthar, a registered physiotherapist in Ontario and a former competitive powerlifter. This guide covers what I look at when a lifter sends me bench videos: the set-up, grip width, scapular position, and how to tell a technique problem from a load-management problem. It also covers what to do if the bench has started to hurt.
TL;DR
- Set the base first: feet planted, upper back and shoulder blades on the bench, ribs stacked, bar held over the wrist and forearm.
- Grip width is a trade-off. Narrower grips (under 1.5 times your biacromial width) with retracted shoulder blades were linked to lower shoulder joint stress, while wider grips can shorten the bar path.
- Pain is easier to sort when you note which phase of the lift triggers it, and where you feel it.
- Technique causes (set-up, bar path, grip, bracing) and load causes (volume, intensity, frequency, recovery) need different fixes. Work out which one you are dealing with first.
- If you have pain, a criteria-based progression with modified variations is usually a better first step than complete rest.
Table of Contents
- The set-up that everything else depends on
- Grip width: what the research says and how to choose
- Shoulder blades: retraction and what it does
- Bar path, sticking points and bracing
- Technique causes versus load-management causes
- Which structure might be involved?
- A criteria-based return to benching
- Red flags: when to get in-person or medical assessment
- My perspective on bench technique
- Working on your bench with me
- FAQ
- Next step
- Sources
The set-up that everything else depends on
Most bench problems I see start before the bar leaves the rack. A sloppy set-up changes where load lands on the shoulder, so work through it in the same order every time.
- Eyes under the bar. Lie so the bar is roughly over your eyes. This makes unracking and re-racking easier on the shoulder.
- Feet planted. Drive the feet into the floor and keep them there. Under IPF rules effective March 2026, your head, shoulders and buttocks must stay in contact with the bench and your feet flat on the platform, so practise it that way even if you never compete.
- Set the shoulder blades. Pull them back and down toward your back pockets, then press them into the bench. This is the scapular retraction people mention, and it is covered in detail below.
- Create a stable arch. A moderate upper-back arch with the ribs stacked over the pelvis. You do not need a dramatic arch to bench well.
- Grip and wrist. Stack the bar over the forearm, low in the palm, with the wrist close to neutral. A bar that sits back in the hand and lets the wrist bend backwards is a common reason the wrist complains. I cover that in my guide to wrist pain on the bench press.
- Brace, then unrack. Take a breath into the belly, tighten the trunk, and lift the bar off with straight arms. If you want a refresher on bracing mechanics, my article on the Valsalva manoeuvre when lifting explains how and when to use it.
- Lower with control. Bring the bar to the lower chest or sternum area with forearms close to vertical at the bottom. Pause or touch lightly, then press.
If you want a quick self-check, film from the side and from the head end. You are looking for blades that stay put, feet that do not shuffle, and a bar that travels the same path every rep.
Grip width: what the research says and how to choose
Grip width is the most-asked bench question, and the honest answer is that it depends on your goal and on how your shoulders feel.
The trade-off
A 2024 biomechanical study compared bench techniques and found that grips narrower than 1.5 times your biacromial width (the distance between the bony points on top of your shoulders), together with scapular retraction, were associated with lower shoulder joint loading, including at the acromioclavicular (A-C) joint. The authors link this to lower risk for overuse problems such as distal clavicular osteolysis and rotator cuff issues.
The other side of the trade-off: a narrative review of powerlifting injuries notes that wider grips (roughly 1.65 to 2.0 times biacromial width) can allow heavier loads by shortening the bar path, but they raise shoulder torque and stress on the A-C joint. A biomechanical comparison of wide, medium and narrow grips looked at how grip width changes the sticking region in recreationally trained males.

If you compete in IPF-style meets, note that the maximum grip width is 81 cm and a reverse grip is not allowed.
A practical way to find your grip
- Start in the middle. Index fingers or ring fingers near the rings on the knurling is a common starting point for many lifters, then adjust.
- Check the forearm angle. At the bottom, your forearms should look close to vertical from the front. If your elbows are flared far outside your wrists, the grip may be too wide for you. If your wrists are well outside the elbows, it may be too narrow.
- Test by feel. Do a few controlled reps at your usual working weight. A grip that gives you front-of-shoulder or top-of-shoulder pain at the bottom is a signal to experiment, not to push through.
- Match grip to purpose. A wide grip may suit a competition peak if your shoulders tolerate it. A medium or narrower grip is often a good choice for volume work or while a shoulder is irritable.
That last point is how I approach it clinically. If you are managing shoulder irritation, I may temporarily narrow your grip and emphasize scapular control before reloading toward wider variations. That is a criteria-based decision, not a permanent rule.
Close grip versus wide grip
| Wider grip | Medium grip | Closer grip | |
|---|---|---|---|
| Bar path | Shorter | Moderate | Longer |
| Shoulder demand | Higher torque, more A-C joint stress | Moderate | Lower in the research above |
| Elbow and triceps demand | Lower | Moderate | Higher |
| Where it fits | Competition-focused loading if tolerated | Most training | Shoulder irritation, triceps work |
A close grip shifts demand toward the elbow and triceps, so if you have elbow soreness, going narrow is not automatically the answer. My guide to elbow pain on the bench press covers that side.
Shoulder blades: retraction and what it does
Scapular retraction means your shoulder blades are pulled together and down, creating a firm platform to press from. The same 2024 study associated retraction with lower shoulder loading, and it is why I treat blade position as equally important as grip width.
Common faults:
- Setting the blades, then losing them. The shoulders roll forward as the bar leaves the rack or touches the chest. Re-set after unracking if needed.
- Shrugging up. The blades should move back and down, not up toward the ears.
- Over-arching to compensate. A big arch built in the low back is not the same as a stable upper-back set-up.
- Letting the bench do nothing. Your upper back should feel pinned to the bench, so the load goes through the chest and arms rather than sliding around the shoulder.
There is also a subtler factor. Research on bench technique shows that the mediolateral force you apply to the bar (whether you try to pull the bar apart or squeeze it together) changes shoulder joint loading regardless of grip width. Cueing "bend the bar" slightly or changing how you push may change how the joint feels.
Bar path, sticking points and bracing
The bar does not travel in a straight vertical line for most lifters. It usually lowers toward the lower chest and presses back up and slightly toward the face. What matters is that the path is repeatable and that your forearms stay stacked.
On sticking points: a link-chain model of the bench and overhead press describes the sticking region as a local velocity minimum that occurs when shoulder torque drops below a critical threshold. In practical terms, if you stall just off the chest, the shoulder may be the limiting factor, and if you stall near lockout, the triceps and elbow may be. Adding more volume to the same movement is not always the answer. Paused reps help with the first; close-grip work and triceps strength help with the second.
Bracing matters as well. Leg drive, a tight trunk and a locked-in upper back give the press a stable base. When bracing fades mid-set, the bar path often drifts, and you may not feel it in the moment.
Technique causes versus load-management causes
When a lifter says "my bench hurts", I separate two buckets. They overlap, but the fix differs.
Technique causes
- Set-up: lost scapular position, no leg drive, flat feet or shuffling feet
- Bar path: bar drifting toward the shoulders or too far from the eyes line
- Bracing: trunk or upper back softening during the rep
- Grip: too wide for your shoulders, or bar sitting back in the palm
- Stance and depth: a bounce off the chest, or touch point too high
Load-management causes
- Volume: a sudden jump in weekly sets or reps
- Intensity: too many near-max singles
- Frequency: benching on consecutive days without enough recovery
- Recovery: poor sleep, high life stress, a new job or a new program
One pattern I explain often: bench-related shoulder pain is frequently an overuse problem, which may indicate that your current training dose exceeds what the tissue is ready for. That does not automatically call for complete rest. It points toward adjusting load or variation. If you fix technique but keep the same overload, the pain often returns. If you cut volume but keep a faulty set-up, the same thing may happen.
Which structure might be involved?
I cannot diagnose you from an article, and the pattern below is a guide to what may be worth discussing with a clinician. It is not a diagnosis. Noting the phase of the lift where pain shows up and the location can help narrow it down.
| Structure | Where you may feel it | When it tends to show up | What may help distinguish it |
|---|---|---|---|
| A-C joint (top of the shoulder) | Top of the shoulder, at the collarbone end | Bottom of the press, often with wide grips | Pain at the very bottom of the lift may indicate A-C joint compression; tender on pressing over the joint |
| Pectoralis minor tendon | Front of the shoulder, near the bony point called the coracoid | During active pressing or contraction | Described in the literature as "bench-presser's shoulder", with tenderness just inside the coracoid and pain on active contraction |
| Glenohumeral joint and rotator cuff | Deep or front of the shoulder, sometimes a sense of instability | Bottom of the press, or when the shoulder feels unstable | Often linked with set-up or scapular control; may feel worse with certain grips |
| Triceps tendon or elbow | Back of the elbow | Near lockout | Pain changes with close-grip work |
| Wrist | Back or thumb side of the wrist | Throughout the press | Changes with bar position in the palm |
Pain at the bottom of the lift may indicate A-C joint compression, while pain with active contraction or certain grip changes may point toward muscular tendinopathy. For a longer walkthrough, see my article on bench shoulder pain in Ontario.
A criteria-based return to benching
If your bench has become sore, here is the progression I use as a framework. It moves by criteria, not calendar dates. Move to the next stage only when the criteria for the current one are met. If a step flares you, go back one stage.
Stage 1: calm it down, keep loading
- Variations: isometric presses against pins at a pain-free range, floor press, tempo bench with a slow lowering phase at light load, close-to-medium grip
- Move on when: daily activities and the isometrics no longer provoke your usual pain, and the next day is not worse than baseline
Stage 2: rebuild range and control
- Variations: paused bench with a controlled touch, pin press from a set height, tempo reps with a short pause
- Move on when: you can complete your working sets at a moderate load with stable blade position and with discomfort staying low and settling within a day
Stage 3: reload toward your usual bench
- Variations: full range bench at your chosen grip, gradually heavier, paused reps at heavier loads
- Move on when: you tolerate repeated sessions at working loads, form is consistent on video, and you can reintroduce your wider grip if you choose to
Stage 4: peak and test
- Variations: heavy singles and doubles, competition-style paused bench if you compete
- Move on when: you tolerate your usual training week without a flare
Keep the rest of your training going
A sore bench does not mean you must stop everything else. Lower-body work can often continue with variations that spare the shoulder and back, for example a Safety Squat Bar squat if the straight bar stresses your shoulders in the rack position, or trap bar deadlifts and block pulls when you want to reduce range or load on the lower back. If you are managing a tendon, a slow, heavy approach may fit, and I explain one in my heavy slow resistance protocol for lifters. For lower-body and back work, the Lifter's Hip & Lower Back Toolkit is a free place to start.
Stretching alone rarely solves a bench problem. It can feel good, but the lasting change usually comes from adjusting technique and load, and then rebuilding capacity.
Red flags: when to get in-person or medical assessment
Virtual care suits many strength-related problems, but some situations need hands-on or urgent assessment. Seek in-person or medical care promptly if you have:
- A sudden pop or tearing sensation in the chest or shoulder, followed by bruising, a visible deformity or loss of strength (a pectoralis major tear, for example, needs prompt assessment)
- Chest pain, shortness of breath, or pain spreading into the jaw or left arm, especially during or after exertion (call 911)
- Numbness, tingling or weakness that is spreading down the arm or into the hand, or neck pain with those symptoms
- Severe night pain, unexplained fever, or unexplained weight loss alongside the pain
- A shoulder that feels like it is slipping out of place, or that you cannot lift after a fall or impact
- Swelling, redness and heat around a joint
These do not apply to most lifters, but if one fits, an in-person assessment through an emergency department, walk-in clinic or your family physician is the right next step.
My perspective on bench technique
I see many lifters fixate on one variable: the grip width, the arch, or a single cue they saw online. In my experience, the more useful question is what your shoulder is tolerating right now and what you want from the lift. A slightly narrower grip and a firmer shoulder blade set-up may be a good place to start when something is irritated, and wider grips can come back as the criteria are met.
I also think lifters deserve more credit than "just rest." Pain during the bench does not usually mean you must stop pressing. It more often means the current dose, variation or set-up needs adjusting. My aim is to explain what may be irritated in lifter terms, then build a plan using modified variations where appropriate.
— Parth
Working on your bench with me
If you are in Ontario and want help with your bench, the Initial Assessment is $130 and includes a full subjective and objective assessment and a movement screen, plus a lift analysis if you send videos beforehand. It aims to explain what tissue may be irritated and to build a criteria-based return-to-lifting plan. Follow-Up Sessions are $100. You do not need a doctor's referral to see a physiotherapist in Ontario, though some insurers require one for reimbursement, and many extended-health plans cover physiotherapy.
FAQ
How wide should my bench grip be?
There is no single answer. Research links grips under 1.5 times your biacromial width with lower shoulder joint stress, and wider grips can shorten the bar path but raise shoulder torque. Start in the middle of the knurling, check that your forearms look close to vertical at the bottom, and adjust if the shoulder or elbow complains.
Should my shoulder blades be pinched together on the bench?
They should be pulled back and down and pressed into the bench, then held there for the whole rep. The goal is a stable platform, not squeezing as hard as possible. If you lose the position when you unrack, reset it before you start your first rep.
How do I know if I'm benching correctly?
Film a set from the side and from the head end. You are looking for stable feet, blades that stay set, a repeatable bar path, and forearms that stay stacked. If you notice pain at a specific phase, note where it is and when it happens, because that detail is useful for any clinician.
Is a close grip better than a wide grip for shoulder pain?
A closer grip was associated with lower shoulder loading in the research above, so it is often a reasonable temporary change. It does shift demand to the elbow and triceps, so it is not automatically better. A criteria-based approach lets you test and decide.
Next step
If your bench is sore or stuck and you want a second set of eyes on your set-up, book with me for a free 15-minute consult at physioparth.com. The call is a fit check, not an assessment or treatment.
Sources
- Effects of bench press technique variations on musculoskeletal shoulder loads and potential injury risk (PMC)
- Effects of bench press technique variations on musculoskeletal shoulder loads (PubMed)
- Narrative review of injuries in powerlifting (PMC)
- Wide, medium and narrow grip width biomechanical analysis (PubMed)
- Shoulder and elbow mechanics and the sticking region (PubMed)
- The bench-presser's shoulder: pectoralis minor tendinopathy (PMC)
- IPF Technical Rulebook, effective 1 March 2026
Recommended
- Bench Shoulder Pain in Ontario: When a 45° Fix Isn’t Enough
- Wrist Pain on the Bench Press: Causes, Fixes, Return Plan
- Bench Press Elbow Pain: 45° Fixes for Strength Athletes
This article is general education for strength athletes and is not a substitute for an individual assessment. Pain that is severe, worsening, or accompanied by numbness, weakness or loss of function needs prompt in-person or medical assessment. Author: Parth Suthar, Registered Physiotherapist (Ontario).